Step-by-Step Guide to Setting Up a Private Limited Company in India as a Foreign National
Setting up a Private Limited Company in India as a foreign national offers a structured and flexible way to enter the Indian market. A PLC allows 100% Foreign Direct Investment (FDI) under the automatic route in most sectors, making it a preferred choice for international entrepreneurs. This guide provides a detailed, step-by-step process to help foreign nationals establish a PLC in India as of June 2025, ensuring compliance with the Companies Act, 2013, and other regulations.
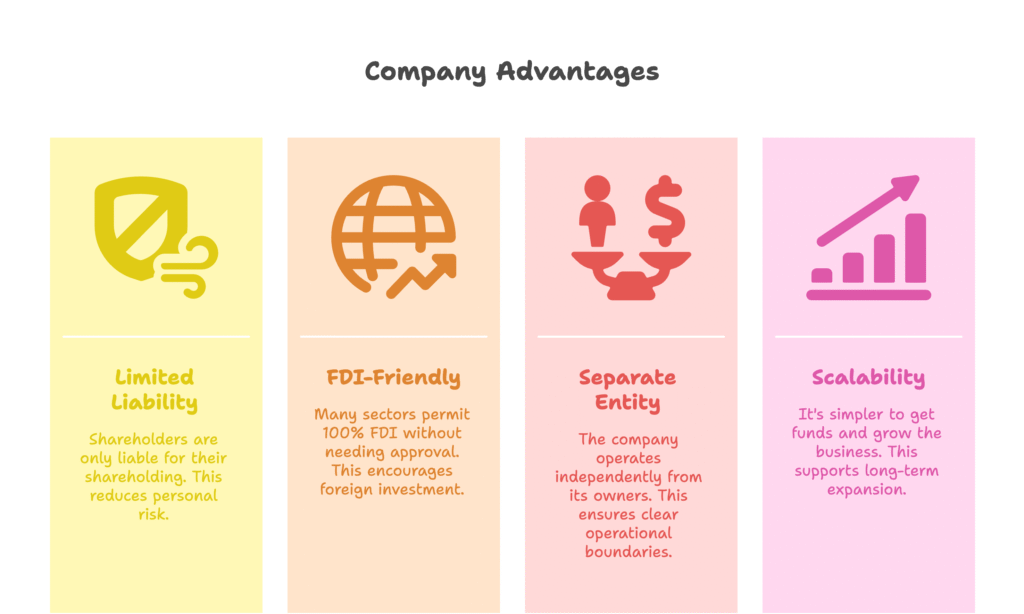
Why Choose a Private Limited Company?
- Limited Liability: Shareholders’ liability is limited to their shareholding.
- FDI-Friendly: Most sectors allow 100% FDI without prior approval.
- Separate Legal Entity: The company is distinct from its owners, ensuring operational independence.
- Scalability: Easier to raise capital and expand operations.
Step-by-Step Process to Set Up a PLC in India
Step 1: Understand Eligibility and Requirements
- Minimum Directors and Shareholders:
- At least two directors are required, one of whom must be a resident of India (residing in India for at least 182 days in the previous financial year).
- A minimum of two shareholders is required; shareholders can be individuals or entities, and foreign nationals/companies are eligible.
- Capital Requirement:
- No minimum capital is mandated, but a nominal amount (e.g., INR 1 lakh) is recommended to cover initial expenses.
- Registered Office:
- A physical address in India is mandatory for registration (a commercial or residential address can be used; proof of address is required).
Step 2: Obtain Digital Signature Certificate (DSC)
- A DSC is required to digitally sign incorporation documents.
- For Foreign Nationals:
- Apply for a DSC through a Certifying Authority (CA) in India, such as e-Mudhra or Sify.
- Required documents: Self-attested copies of passport, address proof (e.g., utility bill), and a photograph.
- These documents must be notarized in the foreign national’s home country and apostilled (if from a Hague Convention country) or legalized by the Indian Embassy (if from a non-Hague country).
- For Indian Resident Director:
- Apply using PAN card, Aadhaar, and address proof.
Step 3: Director Identification Number (DIN)
- Each director needs a DIN, a unique identifier issued by the Ministry of Corporate Affairs (MCA).
- Process:
- DIN can be applied for during the incorporation process via the SPICe+ form (Part B).
- Foreign nationals must submit apostilled/legalized passport copies and address proof.
- Indian directors provide PAN and Aadhaar details.
Step 4: Name Reservation
- Choose a unique name for the company, adhering to MCA naming guidelines:
- The name must reflect the company’s objective (e.g., “TechSolutions Pvt Ltd” for a tech company).
- It should not resemble an existing company/trademark or contain prohibited words (e.g., “Government,” “India” without approval).
- Process:
- File Part A of the SPICe+ form on the MCA portal (www.mca.gov.in) to reserve the name.
- Propose two name options in order of preference.
- Upon approval, the name is reserved for 20 days.
Step 5: Prepare Incorporation Documents
- Key Documents:
- Memorandum of Association (MoA): Outlines the company’s objectives, authorized capital, and shareholder details.
- Articles of Association (AoA): Defines the company’s internal rules and governance.
- Declaration by First Directors and Subscribers: A declaration of compliance with the Companies Act, 2013.
- Proof of Registered Office: Utility bill (not older than 2 months) and a No Objection Certificate (NOC) from the property owner.
- Identity and Address Proof: For foreign nationals, apostilled/legalized passport and address proof; for Indian directors, PAN and Aadhaar.
- Additional Requirements for Foreign Nationals:
- All foreign documents must be notarized and apostilled/legalized.
- A board resolution from the foreign entity (if a shareholder) approving investment in the Indian company.
Step 6: File the SPICe+ Form for Incorporation
- The SPICe+ (Simplified Proforma for Incorporating Company Electronically Plus) form is a single-window application for company incorporation.
- Components:
- Part A: Name reservation (already completed in Step 4).
- Part B: Incorporation details, including MoA, AoA, director details, and registered office address.
- Steps:
- Log in to the MCA portal and complete Part B of the SPICe+ form.
- Attach all required documents (e.g., MoA, AoA, identity proofs, address proof).
- Pay the applicable fees (based on authorized capital; e.g., INR 5,000 for INR 1 lakh capital, plus stamp duty).
- Upon submission, the form is processed by the MCA.
- Outcome:
- Upon approval, the MCA issues the Certificate of Incorporation (CoI), along with the company’s CIN (Company Identification Number), PAN, and TAN.
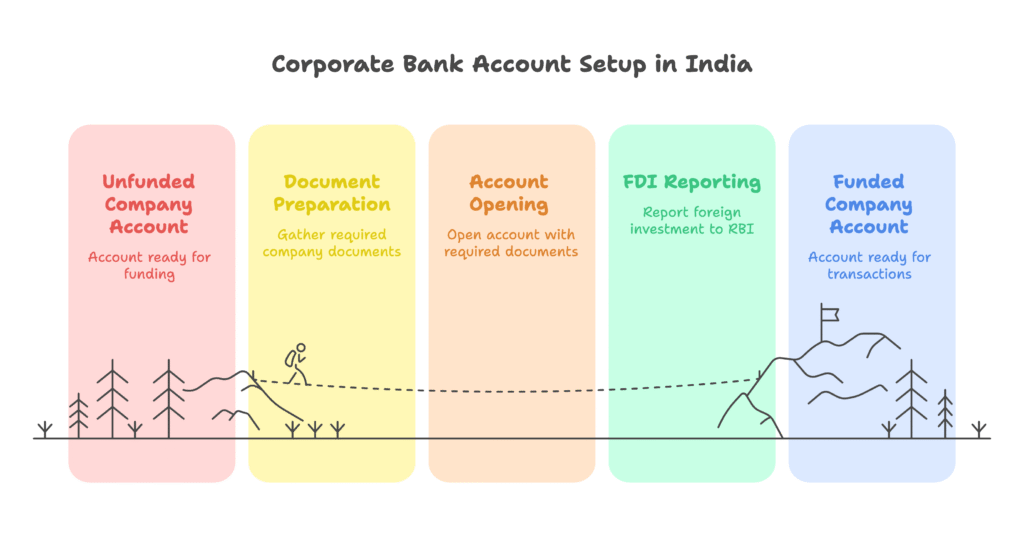
Step 7: Open a Bank Account and Deposit Share Capital
- Open a corporate bank account in India to deposit the share capital.
- Documents Required:
- Certificate of Incorporation, PAN, and TAN.
- MoA and AoA.
- Board resolution authorizing the account opening.
- Identity and address proof of directors.
- FDI Reporting:
- If share capital is contributed by a foreign national/entity, report the FDI to the Reserve Bank of India (RBI) within 30 days of allotment via the Foreign Inward Remittance Certificate (FIRC) and Form FC-GPR.
Step 8: Obtain Mandatory Registrations
- GST Registration:
- Mandatory if the company’s annual turnover exceeds INR 40 lakhs (INR 20 lakhs for certain states).
- Apply online via the GST portal (www.gst.gov.in) using the company’s PAN.
- EPF and ESIC Registration:
- Required if the company employs 20 or more employees (EPF) or 10 or more (ESIC).
- Register on the respective portals (www.epfindia.gov.in and www.esic.nic.in).
- Shops and Establishments Registration:
- Obtain this license from the state labor department within 30 days of commencing operations.
Step 9: Comply with Post-Incorporation Requirements
- Appoint an Auditor:
- Appoint a statutory auditor within 30 days of incorporation.
- File Form INC-20A:
- File a declaration of commencement of business within 180 days of incorporation, confirming that share capital has been received.
- Annual Compliances:
- File annual returns (Form MGT-7) and financial statements (Form AOC-4) with the MCA.
- Comply with FDI reporting (Form FLA) if applicable.
Key Considerations for Foreign Nationals
- Resident Director Requirement:
- Appointing a reliable Indian resident director is crucial. Consider hiring a professional director if needed.
- Apostille/Legalization:
- Ensure all foreign documents are properly apostilled (for Hague Convention countries) or legalized (for non-Hague countries) to avoid delays.
- FDI Compliance:
- Verify if the sector allows 100% FDI under the automatic route. Sectors like defense or media may require government approval.
- Professional Assistance:
- Engage a local Company Secretary (CS) or Chartered Accountant (CA) to navigate the process smoothly.
Timeline
- Timeline:
- Name reservation: 2-3 days.
- DSC and DIN: 2-5 days.
- Incorporation (SPICe+ processing): 7-10 days.
- Total: Approximately 15-20 days, assuming no delays.
Conclusion
Setting up a Private Limited Company in India as a foreign national is a straightforward process if you follow the steps outlined above and ensure compliance with Indian laws. From obtaining a DSC to filing the SPICe+ form and meeting post-incorporation requirements, each step is critical to establishing a successful business presence in India. For a hassle-free experience, consider partnering with local experts to handle regulatory nuances. Start your Indian business journey with confidence and tap into one of the world’s fastest-growing markets!